Projecting is one of the most significant parts of climbing for most people, but strategies for projecting aren’t talked about much. Depending on the climbing community you are in. Who your mentors are (if you’re lucky enough to have mentors), you’ll absorb different people’s methods–maybe you’ll try for the send at the start of the session without warming up, or you’ll siege your project 2-3x a week, or perhaps you’re older and more thoughtful. You’ll do a thorough warm-up before giving a set number of goes on each session, or maybe you’ll take the scatter method of climbing all sorts of stuff and going back every few weeks to see if you’ve improved at your project or perhaps you’ll hope for magic. Whatever your methods, finding a projecting system that works for you will help you accomplish your climbing goals as efficiently as possible.
Picking a Project
Some people are number-focused. Others pick projects by what climb looks cool or what they have access to. I’ve had friends who began projecting V12 when they’d only climbed V6 to friends who have done 100 V10s and never tried a V11. Needless to say, the V6 climber projecting V12 suffered A LOT, but the excellent news is years later, she did eventually reach her goal!
Any grade can be a project. Some of the most challenging climbs for me personally to send have been grades below my max ability, but it didn’t matter because, to me, they were still projects! Whatever your project is, from a V1 slab to a V4 mantle to a V8 roof to a V12 squeeze, make sure you are excited about working on it, and then employ your tactics to try and send!
Initial Evaluation
Check out the climb and make sure it is inspiring to you. Hopefully, it’s got excellent holds or moves, but even if it is just the grade, make sure the appeal means you’re willing to try hard on the climb.
Prep Your Landing
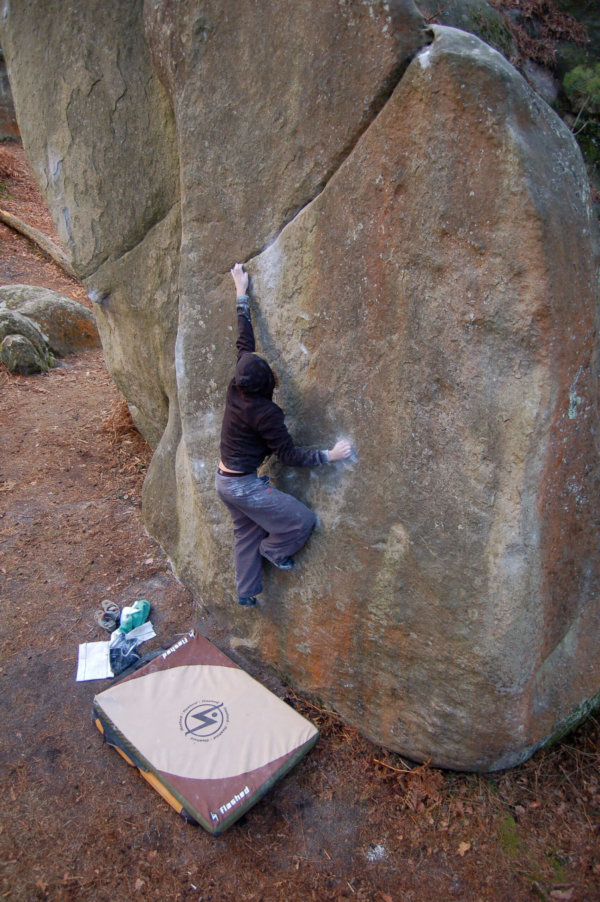
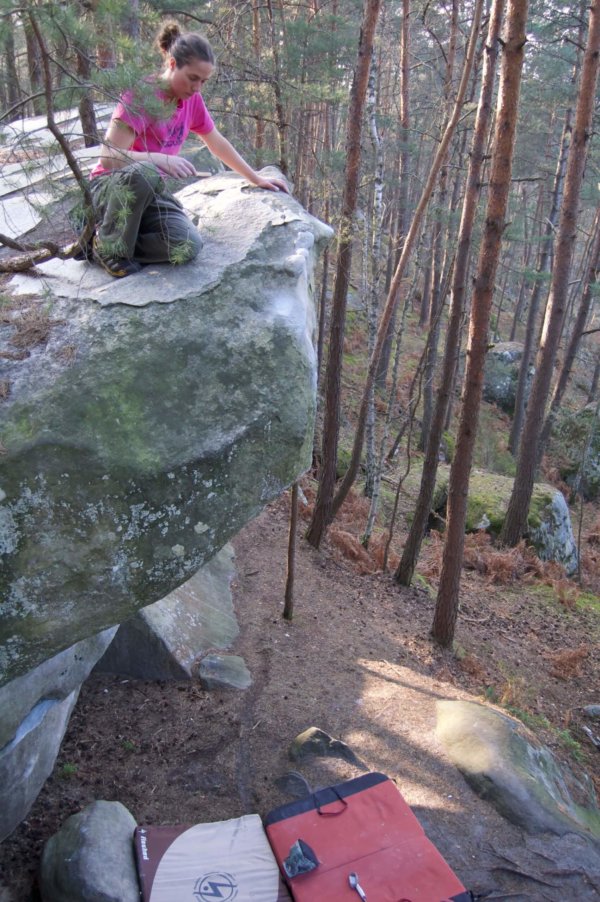
Set up your pads, watching for hazards like rocks, tree roots, and hillsides. Make sure you have enough pads to make a good landing for yourself!
If you have a spotter, read the route together and guess where you may fall, so they are prepared to push you onto the pads if you fall in different places.
Prep Your Holds
Look at the holds you can reach from the ground. Also, look for footholds to support the hand moves you expect to be making. Plan a few methods for climbing the climb and identify all the holds you might use.
Make sure the holds are clean and dry. If the rock is wet, especially if it’s a softer stone like sandstone, it’s best to wait and climb another day instead of risking permanently damaging the rock. Some harder types of rock can be safely dried out, though consider how long and hard it was raining/snowing before you climb on rock that may have water or ice-created weaknesses behind the flakes you are pulling on. When in doubt, wait until you’re sure the stone is dry!
Brush everything! Give all the hands and feet a good once over with a soft-bristle brush. I’ve been loving the Flashed Bert Brush for this step. Then a stick brush (or a Flashed Sumi Brush connected to a stick) can help with holds off the ground too far to reach.
Prep Your Top out
Check the top out and downclimb. You can often climb up the back of the boulder and check the top out. You can sometimes brush the upper holds from here or get them with a stick brush–be careful not to fall! It’s good to brush off excess chalk and leaves/pine needles, plus check for moisture. There is nothing like an unexpectedly wet or icy top-out hueco to scare a pumped climber!
Warm-Up!
I am sure many younger climbers haven’t yet experienced the true benefits of warming up because you may not even notice a difference if you do a few easier climbs before you start the hard ones. You can get away with a lot when you’re young, and skipping the warm-up is one of those things that you may do now and then until it becomes glaringly apparent that warming up helps A LOT when trying to send at your limit. Whether it’s stretching on a yoga mat, pulling on jugs, doing dynamic jumps, hanging on progressively smaller edges, or even pulling on a fingerboard against your feet, the steps you take to warm-up will help your body get prepared for the hard pulling you’re about to put it through. So take the time to warm up!
Skin Prep!
Warming up also means warming up your skin. Pulling against holds will help your fingers wake up and make your skin ready to pull and pull on with less risk of tearing.
Clean your skin of oil and other funk — some people travel with small bottles of alcohol, which works great for some of us though I’ve heard it reported that rubbing alcohol can also make some people’s skin feel more sweaty. An easy method for most skin types is briskly rubbing your hands together with some water bottle water, followed by drying them on your pant leg. Cleaning your skin will keep your holds cleaner longer, and your climbing partners will thank you for not getting the rock all manky.
Support tape – if you have thin spots, consider tape for your warm-up or even for your send goes as long as it’s not interruptive. There are tutorials online for layered taping that are the best you can do if you have to climb with a taped tip.
Liquid Chalk – some climbers like liquid chalk as a good base layer for their climbing day. A thin layer evenly applied is a good start after your hands are clean and taped.
Chalk – A nice layer of chalk can make all the difference, don’t forget to make sure your hands are well chalked before you pull on!
First Go
Even though it’s probably a project, you might as well try to send first go! Some people like to watch videos or get beta from other climbers, which would result in a flash if they climb the problem first try. Other people want to go for the onsight, which means no beta, no videos, nothing! Even if it’s a max project for you, giving an onsight/flash go is an excellent way to try it for the first time. Just look at the climb, make a plan, and give it a try. You never know, you might surprise yourself!
Learn the Moves
Once you’ve fallen off the climb, the pressure to onsight/flash is gone, and you can take the time to learn the moves and figure out a strategy. It’s wise to try different beta ideas and see what works best for you. You can watch other people’s attempts in person or on video and get an idea of different ways to climb the problem. To try moves that feel too hard for you, you can have your friends give you a little weight to help you pull through moves and learn them. If it’s a highball or has a high top out, you may want to hang a rope over it and rehearse the higher moves on toprope.
Learn the Holds
A big part of learning the movement is figuring out how to grab each hold and step on each foot, ideally by practicing grabbing them or through visualization if you can’t figure out how to reach them all. This step may take time–depending on how challenging the climb is for you, you may need to learn how to hold and pull on the different holds even to begin to understand the moves.
Learn the Rock
Rock type familiarity is enormous, and the more rock types you are familiar with, the easier it becomes to adapt to new rock types. A great way to get better at the rock type- both how it feels and how it moves- is to climb as much as you can in the same area. Climb all the warm-ups and anything you can do in an attempt or three. Building your pyramid on that rock type helps in tons of little ways to improve your climbing ability in the area, including experience with the different types of holds, moves, textures, wall angles, and top outs.
Practice what you’re bad at
Don’t be dismayed if holds or moves feel too hard during the first session. If you put in a reasonable effort to learn the moves and holds, there’s an excellent chance they’ll feel more approachable the next time you come! In my opinion, this is part of the magic of climbing — the way our bodies seem to learn in downtime what we’ve practiced, so next time we try, it somehow seems more manageable. The science behind this is muscle engrams. Your body learns the moves and can do them more efficiently in the future, making them feel more manageable.
To teach your body to make the moves, you can recreate similar moves on a home wall, board, or spray wall. Even if the angles aren’t the same, you’ll get value from practicing the body movements or hand or foothold types. One note — if the moves are giving you trouble, it’s ok to practice them on larger plastic/wood holds than the rock holds outside. Slightly better handholds will let your body learn the moves and tension you need to recreate, and the outdoor rock texture will often allow for you to do the same moves on smaller holds than you were rehearsing inside. Combining this strategy with some fingerboard work should help you progress on complex movements with small holds.
Some holds require other parts of the body than just the hands — they may require tension in your shoulders or core or even your legs! It is essential to learn how to hold the outdoor holds and learn how to make the moves so that you can use similar but easier holds inside to recreate the moves and focus on body parts you know you need to engage outside when practicing inside.
If you don’t have a way to practice inside, that’s ok! You can only climb outside and still project efficiently. The inside/outside combo gives you extra tools you can use to speed up the process.
Rehearse
Practice the moves on the climb in as big chunks, aka links, as you can. The last thing you want to do is get through the crux only to fall off the top out! Make sure you have everything dialed that you can dial, so you can make it to the summit when you get through the low percentage crux!
Send Goes
Once you’ve got the moves worked out and know the holds, it’s time for send goes. There are many schools of thought on how to go about send goes. Stacking everything you can control in your favor–feeling good about the pads and spot, brushing the holds, having eaten enough calories to have power, being adequately hydrated, not having to use the bathroom–will help you overcome things, not in your control like weather and relative humidity.
Different climbs require different tactics. Being at your physical best is hard to do on command, but taking steps like those described above can help you give yourself your best chance. That, and remembering to be adequately warmed up and to rest enough between goes, will help you give your best tries.
Rest!
Rest between goes, getting your breathing back to a reasonable tempo, so your body is ready to try hard again. Depending on how long you’ve been climbing, you may need a real break. Go to your friend’s project for a while, then re-warm up for yours. In the shorter term, taking a little walk, eating a snack, or even taking a quick nap can help return you to a state where you can try hard. Think of your body as a machine. If things aren’t going well, make sure you take steps to try and reset yourself mentally and physically, just like you’d reset a machine that wasn’t working well. Then, try again!
Know When To Call It
At some point in any climbing day, you will hit a stage of diminishing returns. Maybe the climb is so hard for you. This is happens in only a few goes. That’s ok! Or maybe your skin is super thin, and one more slip could cause a split. Perhaps you didn’t eat well, drink enough water, or get enough sleep. Maybe it’s super sunny on the crux holds, the sun is in your eyes, or it’s too windy to stay on the wall, too rainy, or just too hot or cold for you. Maybe your mental game is off and you feel scared of the moves or the top out. Sometimes it’s better to pack up and go for hot chocolate and try another day again. Sitting around getting super frustrated is like digging a hole for yourself–in addition to being unpleasant for you and the people around you, you may be teaching your body bad habits on the climb. Instead of beating yourself down, try admitting it’s not the day and moving on to your friend’s project, an easier circuit, or even a treat, then come back another day with a fresh physical and mental state to try again.
A Few Words About Mental Tactics
The joke is that bouldering should be called falling since that’s how most people spend most of their bouldering sessions. Accepting failure is part of the process of finding success on projects.
Pre-Send Anxiety
Knowing you have controlled all the variables you can control will help stack the odds in your favor for a send, but it may also make you nervous–if conditions are perfect, the only factor left to fail or succeed is you! Nervousness can make it hard to climb your best but it can also be used to push you into a state of hyper-focus. In my experience, nervousness tends to show up once I know I can send but haven’t sent yet. When it comes down to my performance and trying to control the future is a great way to get twisted up with anxiety.
I’ve learned this lesson many times, but usually, I remember the first time I discovered it, and the memory helps me move through it even today. As I stood sweating it out at the base of a thin Smith Rock face I was trying to send, an old climbing partner of mine told me that the state of anxiety I was in was the worst part, and as soon as I was on the rock, I’d be in climbing mode and so I might as well get on with it. He was right, and anxiety on the ground turned to focus on the rock–enough to send!
Find a Mantra
There are other mental tricks you may employ as well. On a trip to Spain 20 years ago my mantra was “save your power” because I’d learned that if I spent it too early I wouldn’t have enough to get through the upper cruxes commonly found on Spanish limestone. This encouraged me to climb with more care and tension early on vs allowing foot cutting that may feel fun but drains power quickly. I use these same methods still today with bouldering–climb efficiently when I can so I have power when I need it. I have to say. I’ve never minded getting through a top out with power left to spare.
Find what works for you!
Mental health and athletic performance are far too complex for a simple blog post to solve, so look into resources like books, personal coaching, and podcasts and experiment to find what helps put your mental state in a good place for the send. You don’t have to feel perfect to send a climb, but doing what you can to stack the odds in your favor may make the difference between joy and frustration, and we’d all prefer to have climbing days full of joy.
Have fun!

